Table of Contents
How to Freeze-Dry Candy at Home
Freeze-drying candy at home is a fun and rewarding way to create unique, crunchy treats with intense flavors. The process involves removing moisture from candy while preserving its shape, texture, and flavor. Freeze-dried candy has become increasingly popular due to its long shelf life and delightful, melt-in-your-mouth consistency. In this detailed guide, we’ll walk you through everything you need to know to successfully freeze-dry candy at home. source

Understanding Freeze-Drying
Freeze-drying, or lyophilization, is a dehydration process used to preserve perishable materials by removing water content. The process involves freezing the candy, then reducing the surrounding pressure to allow the frozen water in the candy to sublimate directly from a solid to a gas, bypassing the liquid state. This method preserves the candy’s structure and flavor, resulting in a light, crispy texture that enhances the candy’s taste.
Why Freeze-Dry Candy?
Freeze-drying candy offers several benefits:
- Enhanced Flavor: The freeze-drying process concentrates the candy’s flavor, making each piece more intense and satisfying.
- Unique Texture: Freeze-dried candy has a crunchy, airy texture that’s unlike anything else, making it a fun and interesting treat.
- Long Shelf Life: Freeze-dried candy can be stored for months or even years without losing its quality, making it ideal for long-term storage.
- Easy to Store and Transport: Without moisture, freeze-dried candy is lightweight and easy to store or carry, making it perfect for snacking on the go.
What You Need to Freeze-Dry Candy at Home
Before you begin, you’ll need to gather the necessary equipment and materials. Here’s what you’ll need:
- Home Freeze Dryer: A home freeze dryer is essential for the freeze-drying process. These machines are specifically designed to remove moisture from food through sublimation. While they can be a significant investment, they are versatile and can be used for a wide variety of foods beyond just candy.
- Candy: Choose the candy you want to freeze-dry. Gummy candies, marshmallows, Skittles, taffy, and fruit chews are popular choices because they undergo interesting transformations when freeze-dried. However, you can experiment with different types of candy to see what works best.
- Freezer (Optional): While most home freeze dryers can freeze candy themselves, pre-freezing the candy in a regular freezer can help speed up the process.
- Baking Sheets: Use baking sheets to spread out the candy when pre-freezing or before placing it in the freeze dryer.
- Airtight Containers or Vacuum-Sealed Bags: Proper storage is crucial for maintaining the quality of your freeze-dried candy. Airtight containers or vacuum-sealed bags will protect the candy from moisture and air, extending its shelf life.
Step-by-Step Guide to Freeze-Drying Candy at Home

1. Select and Prepare Your Candy
Start by choosing the candy you wish to freeze-dry. Different candies react differently to the freeze-drying process, so it’s worth experimenting to find your favorites. Gummy candies, marshmallows, and fruit chews often work particularly well.
- Cut Large Candies: If you’re working with larger candies, such as marshmallows or taffy, cut them into smaller pieces to ensure even freeze-drying. Small, uniform pieces dry more efficiently.
- Consider Candy with Low Moisture Content: Candies with lower moisture content will freeze-dry more quickly and evenly.
2. Pre-Freeze the Candy (Optional)
Pre-freezing the candy in a standard freezer is optional but recommended, as it can help reduce the overall freeze-drying time. To pre-freeze:
- Spread the candy out in a single layer on a baking sheet, ensuring the pieces don’t touch each other.
- Place the baking sheet in your freezer and leave it for a few hours or overnight. The goal is to solidify the candy before it enters the freeze dryer.
3. Load the Candy into the Freeze Dryer
Once the candy is pre-frozen, or if you’re skipping the pre-freezing step, it’s time to load the candy into your freeze dryer:
- Arrange the candy on the freeze dryer trays in a single layer, making sure the pieces aren’t overlapping. This ensures that air can circulate around each piece, promoting even drying.
- Insert the trays into the freeze dryer.
4. Set Up the Freeze Dryer
Next, you’ll need to configure your freeze dryer:
- Start the Freeze-Drying Process: Most home freeze dryers have pre-set programs for different types of foods, including candy. Select the appropriate setting, or if you need to adjust manually, set the temperature to around -40°F (-40°C) to begin the freezing phase.
- Monitor the Process: The freeze dryer will go through a series of cycles, starting with freezing and followed by sublimation (the removal of moisture). The process typically takes anywhere from 12 to 24 hours, depending on the type and amount of candy.
5. Monitor and Adjust as Needed
Throughout the process, monitor your candy’s progress:
- Check the Candy: Periodically check the candy to see how it’s drying. The freeze dryer should be removing moisture without affecting the candy’s shape or flavor. If the candy is still slightly soft or chewy, it needs more time.
- Prevent Over-Drying: While under-drying can lead to spoilage, over-drying can affect the texture and flavor negatively. Make sure to stop the process once the candy is fully dry and crisp.
6. Remove and Store the Freeze-Dried Candy
After the freeze-drying cycle is complete:
- Let the Candy Cool: Allow the candy to cool to room temperature before handling it. This helps prevent condensation from forming, which could introduce moisture back into the candy.
- Store the Candy Properly: Once cooled, transfer the freeze-dried candy to airtight containers or vacuum-sealed bags. Properly stored, the candy will remain crisp and flavorful for an extended period.
Tips and Tricks for Successful Freeze-Drying
- Start with Small Batches: If you’re new to freeze-drying, start with small batches of candy to get a feel for the process. This allows you to experiment with different types of candy without risking large amounts.
- Use Quality Candy: The better the quality of the candy you start with, the better the freeze-dried result will be. Avoid candies with high fat content, as these do not freeze-dry well.
- Experiment with Different Candies: Not all candies freeze-dry the same way. Gummy candies often expand and become airy, while other types might remain more compact. Try different candies to discover your favorites.
- Label and Date Your Containers: When storing your freeze-dried candy, label each container with the type of candy and the date it was freeze-dried. This will help you keep track of freshness and ensure you enjoy your candy at its best.
How to Freeze-Dry Candy Without a Machine: A Complete Guide
Looking for ways to freeze-dry candy without an expensive machine? While professional freeze-drying equipment is typically used to freeze-dry foods by rapidly freezing and removing moisture through sublimation, there are alternative methods you can try at home. These methods, though less effective than a machine, can still preserve candy and give it a unique texture.
In this guide, we’ll walk you through a simple process to freeze-dry candy at home without a machine. This DIY approach may take more time and won’t be as perfect as the professional method, but it’s an affordable and fun alternative.
What You’ll Need:
- Candy (You can use gummy bears, Skittles, marshmallows, or any other candy you prefer.)
- Baking sheet or tray
- Parchment paper
- Freezer (The colder, the better for this process.)
Step-by-Step Guide to Freeze-Drying Candy Without a Machine
1. Prepare the Candy
Start by laying your candy on a baking sheet lined with parchment paper. Be sure to spread the candy pieces out, ensuring they don’t touch each other. This allows better air circulation, which helps the drying process.
2. Freeze the Candy
Once the candy is prepared, place the tray in your freezer. For best results, use the coldest setting available. The goal is to freeze the candy as quickly as possible. In a home freezer, this will take longer than in a professional freeze-dryer.
3. Check for Dryness
The freeze-drying process can take anywhere from 1 to 3 weeks, depending on the candy type and your freezer’s temperature. You’ll want to periodically check the candy during this time. The candy should feel light, brittle, and completely dry once it’s done.
4. Store Your Freeze-Dried Candy
Once the candy is fully freeze-dried, store it in an airtight container to maintain its texture and freshness. Freeze-dried candy can last for several months if stored properly.
Can You Freeze-Dry Candy Without a Machine?
While freeze-drying candy without a machine is possible, the process is slower and less efficient than using professional equipment. Home freezers lack the vacuum function needed for true freeze-drying, but this DIY approach still removes moisture and extends the shelf life of your candy.
Why Freeze-Dry Candy?
Freeze-drying candy has become popular because it changes the texture and intensifies the flavors. Freeze-dried candy is lighter, crunchier, and often tastier than its original form. It’s a unique way to enjoy your favorite sweets, and it makes an interesting addition to desserts, snacks, or even gift baskets.
Best Types of Candy to Freeze-Dry at Home
Some candies work better than others for this DIY freeze-drying method. Here are some options to try:
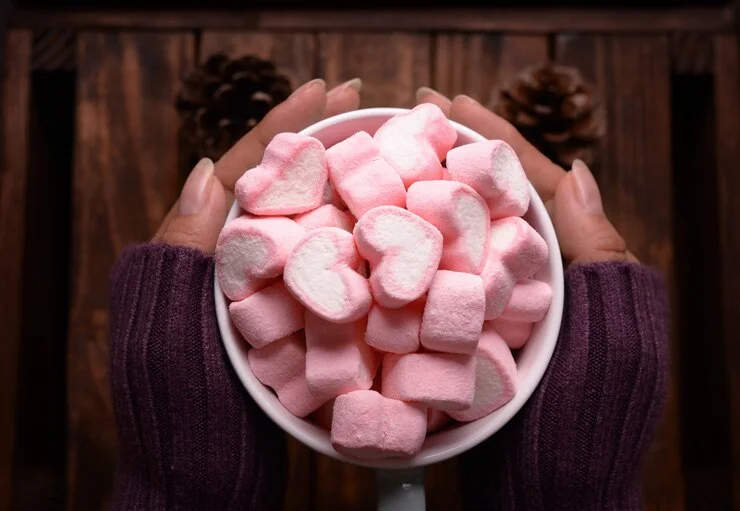
- Marshmallows: Freeze-drying marshmallows results in a crunchy, melt-in-your-mouth texture, similar to the marshmallows found in cereal.
- Gummy Bears: Gummy candies take on an airy, crunchy texture when freeze-dried.
- Skittles and Hard Candy: These candies become light and crispy, with their flavors becoming more concentrated.
Tips for Freeze-Drying Candy Without a Machine
- Use Small Candy Pieces: Larger pieces may take longer to dry, so cut large candies into smaller chunks if needed.
- Check Regularly: Be sure to check the candy periodically to ensure it’s drying properly and doesn’t stay in the freezer too long.
- Use a Vacuum-Sealed Bag: For longer-term storage, consider vacuum-sealing your freeze-dried candy to maintain its freshness.
Freeze-drying candy without a machine may take patience, but it’s an easy and cost-effective method you can try at home. With just a freezer, baking sheet, and some candy, you can create your own crunchy, freeze-dried treats that are perfect for snacks, gifts, or even just a fun experiment.
Common Questions About Freeze-Drying Candy
1. How Long Does the Freeze-Drying Process Take?
The freeze-drying process can take anywhere from 12 to 24 hours, depending on the type and quantity of candy, as well as the specific freeze dryer model you are using.
2. Can I Freeze-Dry Chocolate?
Chocolate and other high-fat candies don’t freeze-dry well because the fat content makes it difficult to remove moisture. Stick to candies with lower fat content for the best results.
3. How Long Will Freeze-Dried Candy Last?
When properly stored in airtight containers or vacuum-sealed bags, freeze-dried candy can last for several months to years without losing its quality.
4. Is It Expensive to Freeze-Dry Candy at Home?
The initial investment in a home freeze dryer can be significant, but the cost per batch of freeze-dried candy is relatively low. Over time, the machine can pay for itself if you frequently use it for various foods.
Conclusion
Freeze-drying candy at home is a creative and satisfying way to make long-lasting, flavorful treats that are perfect for snacking, gifting, or even selling. With a bit of preparation and the right equipment, you can transform your favorite candies into unique, crunchy delights that retain all their flavor and last for months or even years. Whether you’re freeze-drying gummies, marshmallows, or something else entirely, the process is sure to be a fun and rewarding experience. Read More

